Summary
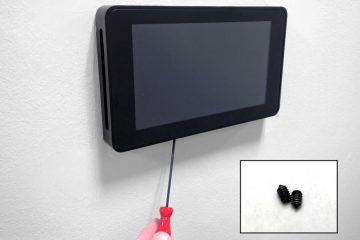
Installing your new wall mounted touchscreen is one thing, but getting power to it is a completely different story. There are several ways to safely get power to your new touchscreen. In essence, you have two 5V devices that each need to receive power for your touchscreen to function. Fortunately, all you need to do is get power to one of the devices and the second can be powered from the first. For this application, we recommend powering the Raspberry Pi directly and then powering the screen using a set of jumper cables (usually provided with the screen).
There are two approaches to powering the Raspberry Pi. The most basic is to run a Micro USB cable to your Pi through the wall somehow. The second approach is to use Power Over Ethernet (POE) to power the Raspberry Pi.
Powering over Micro USB
We mentioned that this is the most basic approach. However, in reality it can be complex at the same time. If you have a short run from the back of your device to your power outlet, you should be in great shape for this approach. However, it can often be hard to get to a power supply before your cable is too long to provide adequate power with a simple 5V 2.4A USB power supply (especially if you are going for a professional looking, all cables in the wall approach). Once the length gets too long, you may need to start playing with a thicker wire gauge as well as an adjustable power supply to get the appropriate voltage to the Pi. If you know what you are doing, this is perfectly doable. However, doing this incorrectly will cause your Raspberry Pi to be unreliable. And worse, it could lead to power cables/supplies running hotter than you might like.
Using Power over Ethernet (POE)
This is the approach we recommend. Using POE is simple and safe. It does add some cost to your project. But with POE, you get both a stable wired network connection and power over a single CAT5 (or better) network cable. There are many POE “Pi Hats” available that work well with our mount. We will provide a list of several we have tested later in this post. If you have room behind Pi, you could also try using a POE splitter. They are often cheaper. But we have also found that many of the lower cost units prove to be unreliable over time.
Powering the Screen from the Pi

To provide power to the touchscreen, you simply need to attach two jumpers from the Raspberry Pi’s GPIO to the screen’s pins. Any of the 5V and ground GPIO pins will do. In the image to the right, you can see that the red wire is connected to GPIO pin 4 and the black wire is connected to GPIO pin 6. The wires are then connected to their respective GND and 5V pins on the screen (the image shows rough location). Once these pins are in place, powering one device will power both.
Note: Depending on the Pi Hat you use, you may need to use alternate GPIO pins.
POE Hats that We’ve Tested
There are quite a few POE hats out there. But here are a few we have tested.
- POE Texas Active Pi Hat
- POE Texas Passive Pi Hat
- Official Raspberry Pi Hat
- Navolabs POE Hat
- LoverPi POE Hat
- The Pi Hut Hat for the Pi 3B
Note: All of the above POE hats work with the Raspberry Pi 3B+ or later (with the exception of the Pi Hut hat which only works with the 3B).